
Recruitment guide
Govt Exam Photo Compression 2026: Reduce Size, Keep — Explained
Discover effective methods to compress government exam photos in 2026 without compromising clarity. Ensure your photo meets size and quality standards easily.

In the digital age, submitting photographs for government exams has become a standard requirement. Whether you are applying for a competitive exam, a recruitment drive, or any official government process, uploading a clear and correctly sized photograph is crucial. However, many candidates face the challenge of meeting strict photo size requirements without compromising image quality. This is especially true for government exams in 2026, where file size limits are often stringent to ensure smooth online processing.
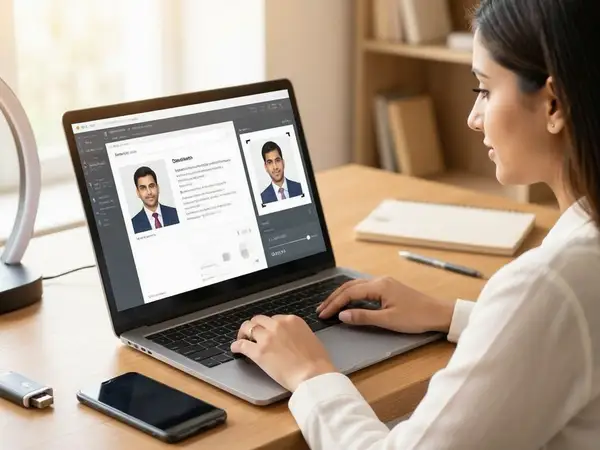
This comprehensive guide will walk you through everything you need to know about government exam photo compression in 2026. From understanding the importance of photo specifications to practical methods for reducing file size without losing clarity, this article aims to equip you with the knowledge to submit perfect photos hassle-free.
Why Photo Size and Quality Matter in Government Exams
Government exam applications routinely require candidates to upload photographs that meet specific criteria. These criteria typically include dimensions (width and height in pixels), file format (JPEG, PNG, etc.), and file size (usually in kilobytes). The reasons behind these strict requirements are:
- Efficient Data Handling: Smaller file sizes reduce server load and speed up the upload and download process.
- Uniformity: Standardized photo sizes help maintain consistency across applications, making verification easier.
- Clarity for Identification: Clear photos are essential for identity verification during admit card issuance, examination, and result processing.
- Compliance: Non-compliance with photo specifications can lead to application rejection or delays.

Therefore, it is vital to submit a photo that balances size and clarity perfectly.
Common Photo Specifications for Government Exams in 2026
While specifications may vary slightly between exams, the most common photo requirements include:
| Specification | Typical Requirement |
|---|---|
| Dimensions | 200 x 230 pixels, 300 x 300 pixels, or as specified |
| File Format | JPEG/JPG, PNG |
| File Size | 10 KB to 100 KB (varies by exam) |
| Background | Plain white or light-colored background |
| Photo Type | Recent passport-size color photograph |
Always check the official notification for the specific exam you are applying for, as these requirements may differ. Incorrect size or format can result in rejection of your application.
Understanding Photo Compression: Lossy vs. Lossless
Photo compression is the process of reducing the file size of an image to meet upload requirements. There are two main types of compression:
- Lossy Compression: This method reduces file size by removing some image data, which may slightly reduce quality. JPEG is a common lossy format.
- Lossless Compression: This method reduces file size without any loss of image quality by optimizing image data. PNG is a common lossless format.
For government exam photos, lossy compression is often used because it achieves smaller file sizes. However, excessive compression can cause blurriness or pixelation, which is unacceptable for official use. The key is to compress the image enough to meet size limits while preserving clarity.
How to Reduce Photo File Size Without Losing Clarity
Here are detailed, actionable methods to compress your government exam photo effectively:
1. Resize Image Dimensions
One of the most effective ways to reduce file size is to resize the image dimensions to match the required specifications exactly. Oversized photos consume more space unnecessarily.
- Use free tools like Paint (Windows), Preview (Mac), or online services such as ResizeImage.net.
- Maintain the aspect ratio to avoid distortion.
- Set the dimensions according to the official guidelines (e.g., 200 x 230 pixels).
2. Choose the Right File Format
JPEG is usually preferred for photos because it balances quality and file size well. PNG files tend to be larger as they are lossless.
- Convert your photo to JPEG if it’s currently in PNG or BMP format.
- Use image editing software or online converters for this purpose.
3. Adjust JPEG Compression Level
When saving a JPEG image, most editors allow you to adjust the quality level (compression rate). A quality setting between 70% and 85% often reduces file size significantly without noticeable quality loss.
- Use tools like Adobe Photoshop, GIMP, or online compressors such as CompressJPEG.com.
- Preview the image after compression to ensure clarity is maintained.
4. Use Online Compression Tools
Several free online tools specialize in compressing images for government exam uploads:
- ILoveIMG – Compress images while preserving quality.
- TinyPNG – Great for PNG and JPEG compression.
- JPEG-Optimizer – Adjust compression levels easily.
These tools are user-friendly and require no software installation.
5. Crop Unnecessary Areas
If your photo has extra background or margins, cropping can reduce file size by eliminating unused pixels.
- Ensure your face and shoulders remain clearly visible.
- Use cropping tools in photo editors or online platforms.
6. Use Image Editing Software for Advanced Compression
For users comfortable with software, advanced tools offer better control:
- Adobe Photoshop: Use “Save for Web” feature to optimize size and quality.
- GIMP: Free alternative with export options to adjust compression.
- Paint.NET: Lightweight and easy to use for resizing and compressing.
7. Check DPI and Resolution
DPI (dots per inch) is important mainly for printing but can affect file size. Most government exam photos require 300 DPI or 72 DPI for digital use.
- Set DPI according to instructions; 72 DPI is usually sufficient for digital uploads.
- Higher DPI increases file size unnecessarily.
Step-by-Step Guide to Compressing Your Government Exam Photo
Here is a simple workflow to compress your photo effectively:
- Capture a Clear Photo: Use a good camera or smartphone with adequate lighting and a plain background.
- Transfer the Photo: Upload the photo to your computer or device.
- Resize Dimensions: Use an image editor to resize the photo according to the exam’s specifications.
- Crop if Needed: Remove excess background or borders.
- Convert to JPEG: If necessary, convert the image to JPEG format.
- Adjust Compression: Save the image with 70-85% quality to balance size and clarity.
- Check File Size: Ensure the file size meets the exam’s limits (e.g., under 50 KB).
- Preview the Image: Zoom in to check for blurriness or pixelation.
- Rename File: Use your full name or application number as per instructions.
- Upload: Submit the photo on the application portal.
Common Mistakes to Avoid When Compressing Exam Photos
- Excessive Compression: Over-compressing can blur important details, leading to rejection.
- Wrong Dimensions: Uploading photos that are too large or too small can cause errors.
- Incorrect File Format: Always use the format specified by the exam authority.
- Ignoring Background Requirements: Photos must have a plain background as specified.
- Using Outdated Photos: Always use recent photographs as per guidelines.
- Not Checking File Size: Verify the final file size before uploading.
Best Practices for Taking and Preparing Your Government Exam Photo
Preparation is key to ensuring your photo meets all requirements without last-minute hassles:
- Use a Neutral Expression: Avoid smiling widely; maintain a natural, neutral face.
- Dress Appropriately: Wear simple clothing without excessive patterns.
- Use a Plain Background: White or light-colored backgrounds work best.
- Good Lighting: Ensure your face is well-lit without shadows or glare.
- Avoid Accessories: Remove hats, sunglasses, or any items covering your face.
- Check Photo Guidelines: Refer to official instructions carefully before clicking or uploading photos.
Useful Tools and Resources for Photo Compression
Here is a list of reliable tools that can help you compress and prepare your government exam photo efficiently:
- Online Resizers: ResizeImage.net, PicResize
- Online Compressors: CompressJPEG.com, TinyPNG, ILoveIMG
- Software: Adobe Photoshop, GIMP (free), Paint.NET (free)
- Mobile Apps: Snapseed, Adobe Lightroom Mobile
Remember to always preview your compressed photo on different devices to ensure clarity is retained.
Checks to complete before you apply
Submitting a perfectly sized and clear photograph is a critical step in the government exam application process. With evolving digital requirements in 2026, understanding how to compress your photo without losing clarity is essential. By following the guidelines outlined in this article—resizing dimensions, choosing the right format, adjusting compression levels, and using reliable tools—you can ensure your photo meets all specifications and avoids unnecessary delays or rejections.
Take the time to prepare your photo carefully, and always refer to the official exam notification for exact requirements. For more information on government exams, admit cards, and results, visit our resources at /sarkari-result and /admit-card.
Frequently Asked Questions
Q1: What is the ideal file size for government exam photos in 2026?
The ideal file size typically ranges between 10 KB and 100 KB, depending on the exam’s specifications. Always check the official guidelines for exact limits.
Q2: Can I use a PNG photo for government exam applications?
While some exams accept PNG, JPEG is usually preferred because it offers smaller file sizes with good quality. Check the exam’s official instructions to confirm acceptable formats.
Q3: How can I check if my compressed photo is clear enough?
After compression, zoom in on your photo to check for blurriness or pixelation. The facial features should remain sharp and identifiable.
Q4: Are there any free tools to compress exam photos online?
Yes, several free online tools like TinyPNG, CompressJPEG, and ILoveIMG allow you to compress photos easily without installing software.
Q5: What should I do if my photo exceeds the file size limit after compression?
Try resizing the image dimensions smaller, increasing the compression level slightly, or cropping unnecessary background areas to reduce the file size further.
Related Resources
Related Government Job Resources
Continue with active job hubs and related government job pages on TrueJobs.
Tools for this recruitment topic
Use only the tools relevant to the dates, eligibility or documents discussed above.
TrueJobs Editorial Team
TrueJobs editorial desk
This article is prepared from the sources referenced in the guide and reviewed for clarity, links and dated information. Read our editorial and corrections policy.
Continue This Topic
Follow the closest earlier and newer coverage so older archive posts keep real contextual crawl paths.
Government Exam PDF Upload 2026: Scan Resolution, File Size and Readability Checklist
Discover essential tips on scan resolution, file size, and readability for uploading PDFs in government exams 2026. Avoid common mistakes and submit flawless applications.
Government Exam Server Busy 2026: Best Time to Apply & How to Avoid Failed Submission
Learn when to apply for government exams in 2026 and how to avoid server busy errors and failed submissions for a smooth application process.
Read Next

Government Exam JPEG vs PDF Upload 2026: Which Documents Need Which Format

Government Exam OTP Not Received 2026: Email Spam, DND and Recovery Options
Aadhaar Locked Biometrics 2026: How Candidates Should Unlock Before Exam Day

Government Exam Server Busy 2026: Best Time to Apply & How to Avoid Failed Submission
Explore Topics
Perfect Your Resume
Use our AI-powered Resume Builder to create ATS-optimized resumes.
AI Resume Builder