
Recruitment guide
Offline Govt Job Form Filling: 2026 Mistakes to Avoid — Explained
Avoid costly errors in government job applications with this complete guide to filling offline forms correctly. Learn submission protocols and document requirements for 2026.

While online applications dominate today’s job market, many government departments in India still rely on offline forms for recruitment drives. This adherence to a traditional method is often due to reasons of accessibility for candidates in remote areas, the need for verifiable physical signatures, and the rigorous documentation standards required for sensitive positions. A single, seemingly minor error in these physical documents can unfortunately disqualify even the most eligible and deserving candidates before they even get a chance to prove their merit. This comprehensive guide explains the detailed offline application process for 2026 government jobs and highlights the most critical mistakes to avoid for a successful submission.
We will delve into the nuances of each step, providing practical tips, detailed explanations, and real-world context to help you navigate this traditional but still prevalent system with confidence and precision.
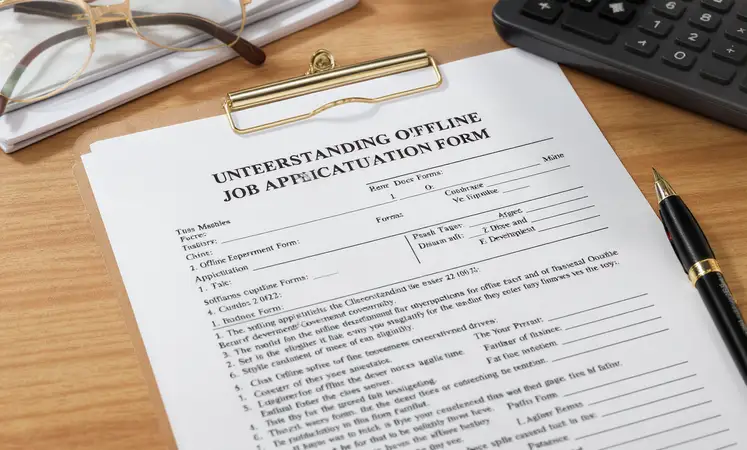
How to Fill Offline Government Job Forms 2026: Avoid These Critical Mistakes
Understanding Offline Government Job Application Forms
Despite the digital push under the Digital India initiative, offline forms remain a cornerstone of recruitment for numerous positions, particularly in sectors like rural development, postal services, municipal corporations, paramilitary forces, and various state-level examinations. These paper-based forms are meticulously designed to capture a comprehensive and verifiable profile of the candidate. They typically include several standardized sections, and understanding the specific purpose and requirements of each part is the foundational step toward a flawless and successful application. The persistence of this system ensures that every applicant, regardless of their access to high-speed internet or digital literacy, has an equal opportunity to apply, thereby upholding the principles of inclusivity in public employment.
The Anatomy of a Typical Offline Form
Most offline government job forms follow a similar structure. Familiarizing yourself with these common sections will help you prepare your information in advance and fill the form more efficiently. This structural consistency across different departments allows candidates to develop a systematic approach to form filling, reducing the likelihood of errors and omissions that could lead to rejection.
- Basic personal information sections: This is the most fundamental part of the form. It includes your full name (exactly as it appears on your 10th-grade/matriculation certificate), father's and mother's names, date of birth, gender, marital status, nationality, a permanent address, and a separate address for communication. Accuracy here is paramount as this information is used for all future correspondence, including sending the admit card, call letters, and final appointment letter. Any discrepancy can lead to identity verification issues later. For instance, a mismatch between the name on your form and your educational certificates can trigger a lengthy verification process or outright rejection.
- Educational qualification tables: These tables require you to list your academic achievements in a specific, usually chronological, order, often starting from matriculation (10th) or higher secondary (12th) onwards. You must precisely state the name of the examination, the board or university, the year of passing, the subjects studied, and the percentage of marks obtained. Be careful when calculating percentages; some notifications require it to be calculated to two decimal places. For professional courses, you may need to specify your specialization and the registration number with a professional council (e.g., Bar Council for lawyers).
- Experience certificates attachment requirements: For posts that demand prior work experience, this section details the necessary proof you must furnish. This often includes experience letters printed on official company letterhead, which should clearly state your designation, duration of employment (from date to date), and key responsibilities. Relieving letters from previous employers and, in some cases, salary slips or bank statements may also be required to substantiate your claim. The experience should ideally be broken down by employer, with clear start and end dates to avoid any gaps that might need explanation.
- Self-declaration and signature fields: This is a crucial legal component of the application. By signing this declaration, you are legally attesting to the truthfulness and accuracy of all the information you have provided. A false declaration can lead to immediate disqualification, debarment from future government examinations, and even legal action. Your signature here must be consistent and match the one on your official IDs and on all other documents you self-attest. Some forms also require a witness signature from a gazetted officer or a magistrate, adding another layer of verification to the process.
It is absolutely critical to verify the absolute authenticity of the form and the notification through official channels. Always download the application form directly from the employing department's official website or trusted and verified government job portals like Sarkari Result before downloading or procuring the form. Fraudulent third-party websites sometimes circulate fake or outdated forms. Using an outdated or incorrect form is a guaranteed way to get your application rejected at the very first stage of scrutiny. Always check the official notification number and release date to ensure you have the correct version.
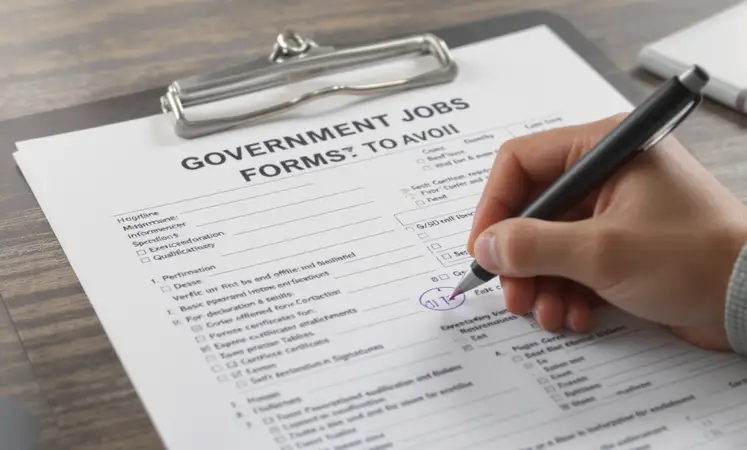
10 Common Mistakes to Avoid
The path to a government job is highly competitive, and the first hurdle is the application form itself. Here, we break down the ten most common errors that lead to rejection, with detailed advice on how to steer clear of them. Understanding these pitfalls in depth will significantly increase your chances of submitting a successful application that passes the initial scrutiny.
-
Ignoring Instruction Booklets: The Rulebook You Can't Ignore
A staggering number of rejections, estimated to be around 23%, occur simply because candidates fail to thoroughly read the accompanying guidelines or information bulletin. These booklets are not mere suggestions; they are the absolute rulebook for the application process. They contain specific, non-negotiable requirements that must be followed to the letter. For example, they will specify the ink color to be used (often only blue or black ballpoint pen, with gel pens or fountain pens being disallowed due to smudging), the exact photograph dimensions (e.g., 3.5cm x 4.5cm), background color (e.g., plain white), the precise order for arranging and attaching documents, and the exact mode of payment (e.g., Demand Draft payable to a specific officer in a specific city).
Overlooking a single detail mentioned here, no matter how small it seems, can invalidate your entire effort and lead to summary rejection. The instruction booklet also contains vital information on the syllabus, exam pattern, and physical standards, making it an indispensable resource for the entire recruitment journey.
-
Illegible Handwriting: Clarity is King
The clarity of your information is non-negotiable. Remember that recruitment personnel have to process thousands, sometimes lakhs, of forms in a limited time. If they cannot easily read your name, address, or other critical details, your application may be set aside without a second thought. To avoid this, always use clear, capital block letters for filling in fields like your name, address, and other critical details, unless the instructions specifically permit cursive or running writing. Many forms use a "one box, one letter" format; practice on a rough sheet to ensure your letters fit neatly within the boxes without touching the borders. Good, clean handwriting reflects diligence and seriousness.
It shows the recruiting authority that you are a careful and detail-oriented individual, which is a valued trait in any government servant.
-
Incomplete Payment Documentation: Securing Your Application Fee
The financial aspect of the application is an area of intense scrutiny. If your payment is made via a demand draft (DD) or an Indian Postal Order (IPO), ensure all details are filled correctly on the form, including the DD/IPO number, issuing bank/post office, and date. A photocopy of the DD/IPO should be securely stapled or pinned to the application for your own records, but the original must be attached to the form. If paying via a bank challan, the "department's copy" or "recruiter's copy" must be attached, not the candidate's copy. Crucially, always write your name, post applied for, and application number (if available) on the top or back of the DD, IPO, or challan copy you submit.
This simple act links your payment directly to your form and prevents it from getting misplaced among the thousands of other applications. For Demand Drafts, also ensure that the validity period (typically 3 months) comfortably covers the application submission and processing time.
-
Mismatched Signatures: Your Signature, Your Identity
Your signature is your unique biometric identifier on paper. It must be consistent and uniform across every single part of the application package. This includes the main form's signature box, across any pasted photograph(s) if required, on every self-attested document photocopy, and on any other required declaration. A signature that looks significantly different in various places can raise red flags about the application's authenticity, leading to suspicion and potential rejection. Practice your signature so it is fluid and consistent. Furthermore, always remember to write the current date next to your signature if a separate space is provided, as this is also a common requirement.
For applications requiring a thumb impression, use black ink and ensure the impression is clear and complete, without any smudges.
-
Incorrect Caste Category: Navigating Reservation Categories
Selecting the right reservation category is critical and has significant implications for your selection process. Double-check the exact code and nomenclature (e.g., SC, ST, OBC-NCL, EWS) as mentioned in the official job notification. A common error is for OBC candidates to be unaware of the "Non-Creamy Layer" (NCL) status requirement or the difference between the Central and State OBC lists. Applicants applying under any reserved categories (SC/ST/OBC/EWS) must provide a valid, recently issued caste/category certificate in the precise format prescribed in an annexure of the job notification. Submitting an invalid, expired, or incorrectly formatted certificate will lead to your application being considered under the Unreserved (General) category, if at all, thereby forfeiting any age or fee concessions.
For Economically Weaker Sections (EWS), the certificate must be issued by the competent authority after April 1st of the current financial year, as per the latest guidelines.
-
Overwriting Without Endorsement: The Art of Correcting Mistakes
A neat, clean, and professional-looking form is essential. Never, under any circumstances, use white correction fluid (whitener), blade scratching, or erasers to correct a mistake. This is often explicitly forbidden and is grounds for immediate rejection as it can be seen as an attempt to tamper with the information. The officially prescribed method for correction is to draw a single, neat horizontal line through the incorrect entry, write the correct information clearly beside or above it, and then place your small signature or initials in the margin next to the correction. This provides a transparent and authenticated audit trail of the change, which is acceptable to recruitment agencies.
However, if multiple corrections are needed, it is often better to start afresh with a new form to maintain a pristine appearance.
-
Missing Supporting Documents: The Checklist is Your Best Friend
Failing to attach a single required document is one of the most common and easily avoidable errors. Before you even think about sealing the envelope, meticulously cross-verify your application against the document checklist provided in the notification. Arrange all your attachments in the exact sequence specified (e.g., 10th marksheet, 12th marksheet, degree certificate, caste certificate, etc.). A pro tip is to photocopy both the front and back of documents like Aadhaar cards or marksheets if any relevant information, like a grading system explanation, is present on the reverse side. Self-attestation must be done on each document individually; don't just sign one and assume it covers all.
For documents in regional languages, it is prudent to attach a notarized English translation if the recruitment is for a central government post where the working language is Hindi or English.
-
Late Submission: Beating the Clock
Government recruitment deadlines are notoriously strict and non-negotiable. It is vital to understand that the "last date for receipt of application" means the application must physically be in the hands of the designated office by the closing time on that date. It does not mean it has to be postmarked by that date. Always account for potential delays in postal services, public holidays, and weekends. To be safe, dispatch your application via a reliable method like registered post or speed post at least 7-10 working days before the final deadline. For candidates in remote areas (like North-Eastern states, Ladakh, Andaman & Nicobar Islands), there is often a later deadline specified; check the notification carefully to see if you qualify.
Some departments also have a provision for hand delivery up to a certain time on the last date, which can be a more secure option if you live nearby.
-
Wrong Postal Address: Delivering to the Right Door
Recruitment departments often have multiple offices or specify different P.O. Box numbers or receiving officers for different posts to streamline their process. Blindly using an address from an old notification or a friend's application is a recipe for your application getting lost or delayed. Always confirm the exact, complete, and current postal address for submission from the most recent official advertisement. Copy it character-for-character, including the building name, officer designation, department, street, city, and most importantly, the correct PIN code. Also, include the specific post name and advertisement reference number in the address line if instructed. This extra step ensures your application is routed to the correct section within a large government building, preventing unnecessary delays.
-
Forgetting Application Tracking: Closing the Loop
Once you have dispatched the application, your job is not done. The postal receipt provided by the post office is your only concrete proof of submission. Preserve it carefully in a safe place and immediately note the tracking number (also known as the consignment number). Use this number on the India Post website to monitor the delivery status online until it shows "Item Delivered". Taking a screenshot of the delivery confirmation page is an excellent idea for a secondary record. Furthermore, regularly check the official recruitment website or trusted portals like Sarkari Result and the Admit Card section for any announcements, lists of accepted/rejected candidates, or the next steps in the recruitment process. Some departments publish a list of all applications received, which you can cross-reference with your name.
Step-by-Step Form Filling Guide
Follow this meticulous, structured sequence for an error-free application process. Experience shows that rushing through these steps is the primary cause of simple, entirely preventable mistakes that can cost you your dream job. This methodical approach minimizes risk and ensures that every piece of information is verified and presented correctly.
- Procure and Photocopy: First, obtain the original application form from the designated source or download the PDF and print it on good quality, clean white A4 paper (preferably 75 GSM or thicker). Ensure your printer settings are on "actual size" or "100% scale," not "fit to page," to maintain the original dimensions. Immediately make 2-3 high-quality photocopies of the blank form. These will serve as your drafts and a personal record. Having multiple copies allows you to practice and also acts as a backup in case you make an irreparable error on the original form.
- Create a Draft: Take one of the photocopies and fill it out entirely using a pencil. This draft version is your practice ground. It allows you to work through the form without pressure, gather all necessary information from your documents (like exact marks and dates), and make mistakes without any consequence. You can erase and refine your entries until they are perfect. This step is crucial for complex forms with multiple tables for educational qualifications and experience, ensuring you fit all information neatly into the allocated space.
- Thorough Verification: Once the pencil draft is complete, meticulously verify every single entered detail. Cross-check dates, grades, percentages, roll numbers, and spellings of names against your original educational certificates, ID proofs, and other relevant documents. It is highly recommended to have a trusted friend or family member review the draft as well; a fresh pair of eyes can often spot errors you might have overlooked. Pay special attention to numerical data like percentage calculations and dates of passing, as these are common sources of error.
- Final Inking: After you have confirmed that the draft is 100% accurate and error-free, carefully and patiently transcribe the information onto the original application form. Use a new, high-quality black or blue ballpoint pen as specified in the instructions to ensure consistent ink flow and avoid smudging. Write slowly and deliberately, ensuring your handwriting is as clear and legible as possible. Let the ink dry completely before folding or handling the form. Work on a clean, flat surface to prevent any accidental spills or creases that could ruin the form's appearance.
- Obtain Attestations: If the form or document photocopies require attestation by a gazetted officer, magistrate, or any other specified authority, get this done at this stage. A "Gazetted Officer" is a public servant whose appointment is published in the Government Gazette. This can include government doctors, principals of government schools, or block development officers. Always carry your original documents with you, as the officer will need to verify them before attesting your photocopies. Do not sign the self-declaration until you are in front of the attesting official if their signature is required next to yours. Plan this step in advance, as finding and scheduling time with a gazetted officer can take a few days.
- Final Checklist and Assembly: Create a final checklist based on the notification's requirements. Physically tick off each item as you assemble the application packet. This includes the filled form, photographs, attested/self-attested document copies, and the fee payment instrument. Staple or use a sturdy paperclip to fasten them together in the exact order specified by the recruiting body. Using a paperclip is sometimes safer as it prevents damage that staples might cause during document scanning. Ensure that any photographs that need to be affixed are done so firmly with glue, not staples, and that your signature partially overlaps the photograph and the form if required.
Document Preparation Essentials
Having your documents prepared, organized, and ready beforehand streamlines the entire form-filling process and prevents last-minute panic. Here are the standard specifications and best practices you should follow. Proper document preparation is not just about having photocopies; it's about ensuring every copy meets the stringent standards set by government recruiting agencies for clarity, authenticity, and completeness.
| Document Type | Specifications and Best Practices |
|---|---|
| Photographs | Keep 4-6 recent (not more than 3 months old), identical passport-sized photographs. The background should be plain white or a light color as specified. Ensure your face is clearly visible (covering at least 70% of the photo), with a neutral expression and both ears visible. You should not be wearing sunglasses or a hat. Some notifications require the date of taking the photograph to be printed on it. Lightly write your name and application number on the back of each photo with a pencil to prevent them from getting mixed up. Avoid wearing white clothes against a white background. For some paramilitary force applications, a specific pose or a full-length photograph may be required. |
| ID Proof | A self-attested photocopy of your Aadhaar card is most commonly required and preferred due to its unique identity verification. Ensure the copy is clear, dark, and legible. Photocopy both the front and back if your address is on the reverse. Other valid IDs like a PAN card, Voter ID, Passport, or Driver's License can be used if specified in the notification. The copy must be self-attested, meaning you must sign across the photo or on the margin and write "Self Attested" and the date. The signature should be partial on the image and partial on the paper to prevent misuse. |
| Educational Certificates | Prepare clear, self-attested photocopies of all required mark sheets and degree/diploma certificates, starting from your matriculation (10th) exam onwards. "Self-attestation" means signing your name on the photocopy and writing the words "Self-Attested" or "True Copy," along with the date of signing. Ensure your signature does not obscure any important information on the document. For mark sheets with multiple pages, ensure every page is photocopied and attested. It is advisable to carry the original set of all certificates and mark sheets to the examination or interview center for final verification. |
| Caste/Category Certificate | This is mandatory for candidates seeking reservation benefits. The certificate must be issued by the competent authority and should be in the format prescribed in the notification's annexure. For OBC-NCL candidates, the certificate must usually be issued within the last financial year. The certificate should clearly mention that the candidate does not fall under the "Creamy Layer". For EWS certificates, the income and asset criteria must be clearly stated as per the latest government norms. Always provide a self-attested photocopy and keep the original safe for presentation during the document verification round. |
| Experience Letters | For experienced posts, provide clear copies of your appointment letters, experience letters on official organization letterhead, and past pay slips or salary certificates. These documents should clearly state the duration of your employment, your designation, and a brief description of your job role. These should ideally be attested by your previous employer or self-attested if the rules allow. If you have worked in multiple organizations, arrange the experience certificates in chronological order. For any gaps in employment, be prepared with a genuine explanation, such as pursuing higher studies. |
Important Note on Lamination: Never laminate your original documents unless the application instructions explicitly ask for it, which is extremely rare. In most cases, laminated documents are not accepted for verification because lamination prevents officials from checking the authenticity of the paper, watermarks, and official seals, and can be seen as an attempt to hide tampering. If your original certificates are already laminated, you may be asked to provide a fresh, non-laminated copy issued by the original authority, which can be a time-consuming process.
Understanding Self-Attestation
A critical and often misunderstood part of document preparation is self-attestation. This is the process by which you, the candidate, certify that the photocopied document is a true and accurate reproduction of the original. It is a legally significant act. To self-attest correctly, take a blue or black ballpoint pen and write the following on the document copy: "Self Attested", followed by your signature and the date. Your signature should be placed in a way that it partly lies on the photocopied image and partly on the blank margin of the paper. This practice is standard across all government applications and is accepted as a valid form of certification for the initial stages of recruitment.
Submission Best Practices
How you package and send your application is the final, crucial hurdle. A poorly presented or incorrectly sent submission can nullify all your hard work. This phase requires careful attention to packaging, addressing, and choosing the right postal service to ensure your application arrives intact, on time, and at the correct destination.
Packaging Your Application Professionally
- Envelope: Use a new, sturdy, good-quality A4-sized envelope (or larger, if needed) that can hold all your documents comfortably without folding the main application form. Avoid using old, torn, or reused envelopes as they look unprofessional and may not withstand transit. If your application is thick, consider using a large flat cardboard envelope to prevent bending during handling and transit, which could damage the form or dislodge attached photographs.
- Addressing: Write the complete destination address clearly and legibly in bold letters on the front of the envelope. It is highly recommended to write "APPLICATION FOR THE POST OF [EXACT POST NAME] AND POST CODE [CODE]" in capital letters on the top of the envelope. This helps in sorting at the recipient's office and ensures your application reaches the correct department quickly. Below this, write the full address as mentioned in the notification. Use a permanent marker or a dark ballpoint pen that will not smudge if the envelope gets wet.
- Return Address: Always include your complete return address (From Address) with your name and PIN code in the bottom-left corner of the envelope. This is crucial as it ensures the application can be returned to you if there is any delivery issue or if it is undeliverable for some reason. Also, write your mobile number near the return address. This allows the postal department or the receiving office to contact you in case of any address-related confusion, potentially saving your application from being returned.
- Postal Service: Always opt for India Post's Speed Post service or Registered Post with Acknowledgement Due (AD). These services are reliable, provide a unique tracking number, and offer proof of delivery. The Acknowledgement Due card from a Registered AD post is returned to you with the recipient's signature and stamp, serving as irrefutable proof of receipt. Avoid using ordinary mail or private couriers unless explicitly permitted, as many government offices do not accept packages from them. Speed Post is generally faster and has a wider network, making it the preferred choice for time-sensitive applications.
Post-Submission Protocol
Your responsibilities continue even after you have dropped the envelope in the post box. Proactive follow-up and organized record-keeping are key to a stress-free experience. This phase is about ensuring your application was received and preparing for the next steps in the selection process, turning your passive wait into an active and productive period.
Staying Ahead After Submission
- Secure Receipts: Keep the postal receipt and the acknowledgment slip (if you sent it via Registered AD) in a dedicated, safe folder for that specific job application. This is your primary proof of submission and will be invaluable if any disputes arise regarding the receipt of your application. Consider scanning these receipts and saving digital copies in a cloud drive for added security. Create a physical file for each job application you send out, keeping all related papers together.
- Note Tracking Details: Write down the tracking number from the receipt in a notebook or save it on your phone. Regularly track the parcel on the India Post website until it shows "Delivered". Taking a screenshot of the final delivery status for your records. Set a calendar reminder to check the status every two days. If the tracking status does not update for an unusually long time or shows an exception, you can proactively visit your local post office with the receipt to inquire about its status.
- Monitor Updates: Make it a habit to regularly check the official recruitment website and trusted job portals like Sarkari Result for any updates. This includes lists of eligible/ineligible candidates, the release of admit cards, announcements of exam dates, or any other corrigendum related to the recruitment. Many departments also send SMS alerts to registered mobile numbers, so ensure the number you provided is active. Subscribe to notification alerts on the official website if the option is available.
- Prepare for Next Stage: Do not wait idly for the admit card to arrive. Assume your application has been accepted and begin your preparation for the next stage of the selection process, whether it is a written test, skill test, or interview. Utilize reliable exam preparation resources, solve previous years' question papers, and study the syllabus mentioned in the notification to stay ahead of the competition. This proactive approach ensures you are not caught off guard if the call for the exam comes sooner than expected.
What to Do If Your Application is Returned
In some cases, applications are returned due to minor errors or insufficient postage. If this happens, do not panic. Carefully review the reason for return stated on the envelope. If it is a correctable error, such as a missing photograph or a unsigned form, rectify the mistake immediately. If the deadline has not passed, repackage the application and send it again using Speed Post for fastest delivery. If the deadline is very close, consider traveling to the submission office to hand-deliver it if the rules permit. Always keep the returned envelope and its contents as proof that you had attempted to submit within the timeline.
Checks to complete before you apply
Mastering the offline form submission process for government jobs is fundamentally a test of a candidate's patience, diligence, and meticulous attention to detail. In a highly competitive landscape, where thousands apply for a handful of posts, a perfectly filled form is your first and most critical step towards success. It is a demonstration of your ability to follow instructions, your organizational skills, and your respect for the procedures set by the government. While the process may seem daunting and archaic in an increasingly digital world, it serves as a great equalizer, providing an avenue for millions of Indians from diverse backgrounds to access public employment.
By internalizing the guidelines, avoiding the common pitfalls outlined, and adopting a systematic, careful approach, you transform this administrative task from a potential obstacle into a surefooted stride towards securing your desired Sarkari Naukri. Remember, the effort you invest in perfecting your application is the first investment in your future career.
Related Government Job Resources
Continue with active job hubs and related government job pages on TrueJobs.
Tools for this recruitment topic
Use only the tools relevant to the dates, eligibility or documents discussed above.
TrueJobs Editorial Team
TrueJobs editorial desk
This article is prepared from the sources referenced in the guide and reviewed for clarity, links and dated information. Read our editorial and corrections policy.
Continue This Topic
Follow the closest earlier and newer coverage so older archive posts keep real contextual crawl paths.
NOC in Government Job Applications 2026: Who Needs It and When to Submit
Learn when and why a No Objection Certificate (NOC) is required for 2026 government job applications, including submission guidelines and expert tips.
How to Read a Government Job Notification in 5 Minutes: A Practical 2026 Guide
Master the art of quickly analyzing government job notifications with our step-by-step 2026 guide. Learn to identify key details and avoid common application mistakes.
Read Next

Government Research Institute Jobs 2026: Scientist, Fellow & Project Roles Guide

Government Department Jobs 2026: Latest Openings & Recruitment Guide

NABARD Grade A 2026: Eligibility, Salary, Exam Pattern & Preparation Guide

Interview-Based Government Jobs 2026: Latest Opportunities Without Written Exams
Explore Topics
Perfect Your Resume
Use our AI-powered Resume Builder to create ATS-optimized resumes.
AI Resume Builder